Intro to Sewing (Brother LS-2125i)
- Madison Tyndall
- Nov 21, 2023
- 3 min read

The sewing machine I use is a Brother LS-2125i. All machines and models differ slightly, so keep this in mind as you read this introduction to sewing.
I also want to point out that my machine needs cleaned and that it doesn't normally have this much of a lint build-up!

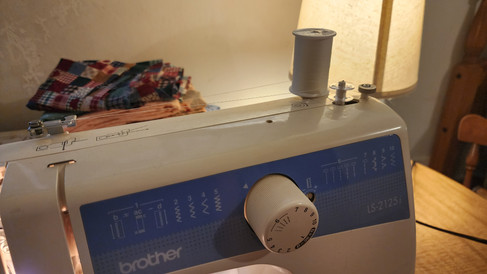
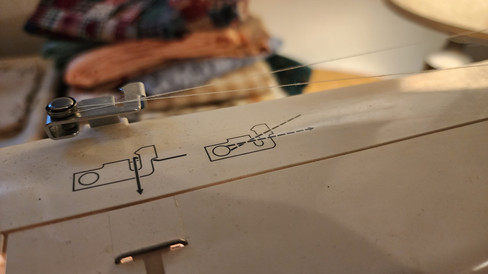
One of the first things to do before starting a new project is threading the needle. The spool of thread usually has a place on top of the machine (shown in picture above), and there should be diagrams of where to weave your thread through for the proper tension before you reach the needle. After the needle is threaded, make sure to leave a couple inches out so the thread doesn't recoil.
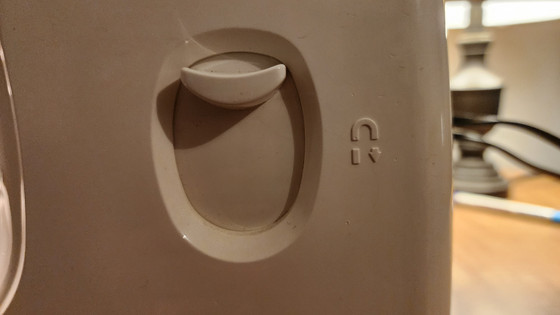
There should also be a way to reverse on your machine, the one on mine is a lever I pull down when I want to sew in reverse. This is most commonly done to fasten down the start and end of a line of stitching.


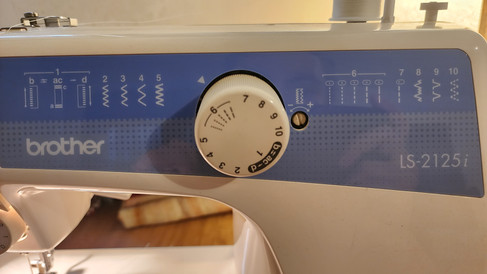
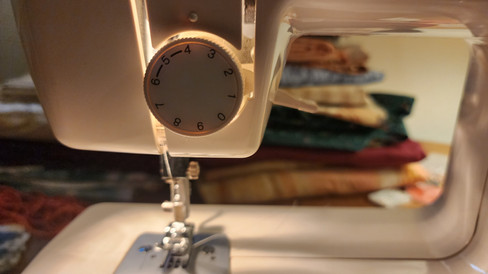
On the front of the machine, there is a knob to adjust tension and a knob to adjust the type of stitch. Most sewing machines have a diagram of what the stitches look like, so you'll know what number corresponds to a specific stitch. Depending on what a pattern calls for, you may need to use several types of stitches to complete one project!
The tension knob doesn't get adjusted much--or at least, I don't adjust mine much. The normal setting for tension is in the middle, around 4. In general, the thicker your fabric, the higher the tension needs to be. For example, if I was sewing denim I would set it at 6, but if I was sewing polyester I might set it to 3 or 4.
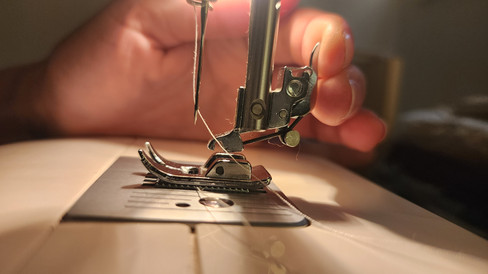
That being said, there are also different types of needles depending on whether you're working with thicker or thinner fabric. Be sure to get sewing needles that are made specifically for your brand of machine.

Beside the needle there should be a little screw that holds it in place. To change your needle you just have to unscrew it, wiggle the needle out, place the new one inside, and turn the screw back in place. Be careful not to loose it, it's a small piece!
There are also different types of sewing feet that can be used on a machine. The kind I have on my machine is a zigzag (or universal) foot. It works for most projects, so I hardly ever switch it out. However, there is a zipper foot, a buttonhole foot, a blind hem foot, overlock foot, and that's only a few of them! If you have a project that requires specific skills, it's always worth it to look into different types of presser feet.
To change the presser foot, there is a tab behind the needle of my sewing machine. When I pull up, the old foot falls off and a different one can easily be attached.

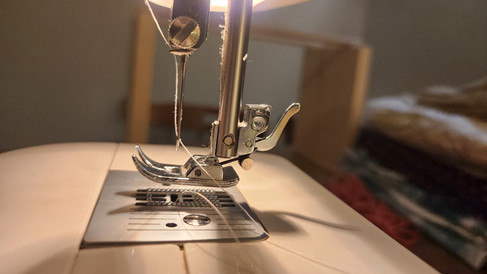

Something else behind the needle, more towards the back of my machine, is a large white lever. This controls the pressure of the sewing foot. When I flip the lever, it makes the foot press down on the fabric, effectively holding it into place while I sew. Then when I want to move the fabric away, I just have to flip the lever back and the foot will lift back up.

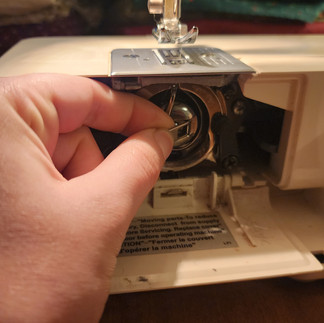
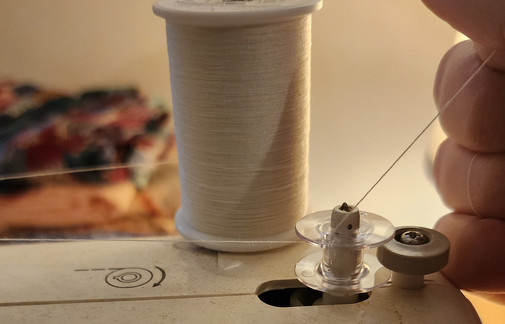
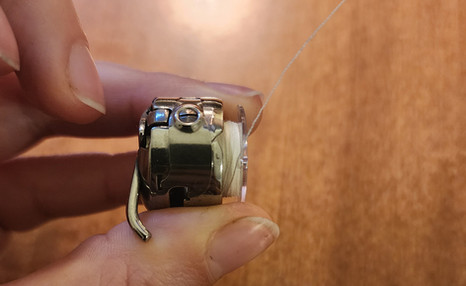
The bobbin is also a very important part of your machine as it feeds the second thread up to the needle when you sew. The bobbin can be found in a compartment under the needle, mine opens from the front of the machine. If you pull the tab in the center, the bobbin compartment should come out easily. Sometimes it almost falls out! The bobbin should also just fall out of the bobbin compartment. Now that you have the empty bobbin, run a thread through the top hole (picture below).

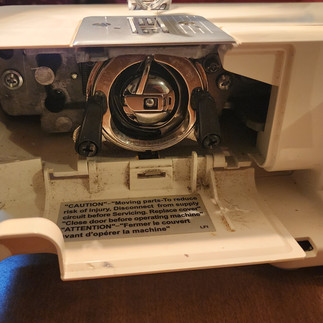


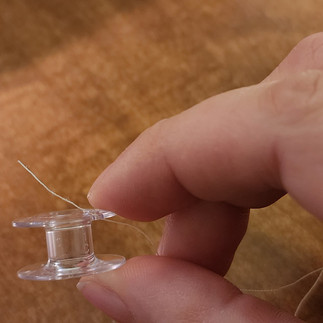
Wrap the thread around the knob for tension, there should be diagrams instructing how to do this. Keeping the end of the thread through the bobbin, lock the bobbin in place, then press on the foot pedal to make the machine run. Hold tight to the end of the thread until it breaks loose, then continue to let the thread run until the bobbin is full.


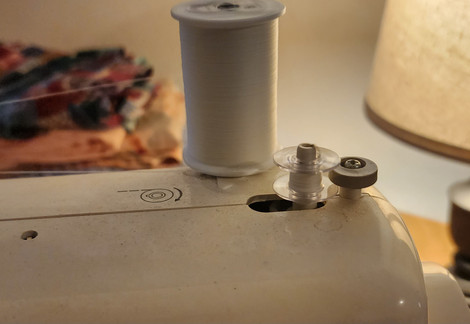
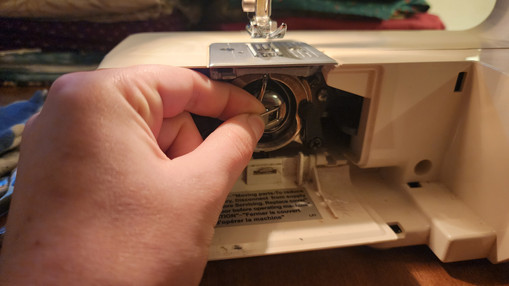
When placing the bobbin back into its compartment, it should look exactly like the picture below, with the thread facing away from you as the bobbin points toward you. Find the groove in the side of the bobbin compartment and wind the thread through. Lift the tab of the bobbin compartment and push it in to secure it in place. Make sure it's locked in there!

I hope this introduction was helpful! Although there is still a lot I didn't cover, I did go over the basics and hope to eventually make a video walkthrough for this as well. Happy sewing!


Comments